We've all been there: typing a long, poetic prompt into an AI generator, hoping for a masterpiece, only to get something that looks like plastic. It feels like gambling. You pull the lever, spend your credits, and cross your fingers. If you're lucky, you get something usable. If not, you're back to the drawing board, tweaking "masterpiece" to "ultra-realistic" in a desperate bid for quality.
But Nano Banana Pro isn't a slot machine; it's more like a high-end camera lens or a master's paintbrush. If you understand the "physics" of how it sees the world, you stop guessing. You start directing.
I spent the last few weeks digging through the best community guides, internal techniques, and some deep-cut articles to figure out why some prompts "hit" while others "miss." Here’s a comprehensive look at what I’ve discovered, along with reviews of the resources that really moved the needle for me.
1. The Foundation: Building a Narrative Hierarchy
A common trap is thinking that more words equals better results. It doesn't. In fact, Nano Banana, like many advanced models, tends to get confused when you bury the lead. I found a breakthrough article on Note.com that discusses the "10 Essential Tips" for prompting. The most important takeaway? Structure matters more than adjectives.
The "Before & After" Logic
Think about how you typically prompt. Most people write horizontally: "A beautiful girl in a car at night with cinematic lighting and high resolution."
Nano Banana hears "beautiful girl car night cinematic." It tries to do everything at once. But when you apply the hierarchy, you start with the Lead, then layer the Details, and finally set the Mood.
The New Formula:
- The Lead: "A photography of a young woman sitting in a car." (This sets the "anchor" for the model).
- The Details: "Vintage leather seats, soft shadows on her cheekbones, visible skin pores, slight messy hair." (This adds the "materiality").
- The Mood: "Midnight, soft neon streetlights reflecting on the window, cinematic noir atmosphere, shot on 35mm film." (This sets the "envelope").
By the time the model gets to "midnight," it already knows who it's lighting and what she's wearing. If you mix these up, you often end up with a girl made of "cinematic lighting" instead of a girl lit by it. The prompt is a material, not a final product. Think of it as mixing ingredients for a cake rather than describing the cake itself.
2. Portraits: Escaping the "Uncanny Valley"
We used to fight with "weird skin" and "dead eyes." Nano Banana Pro changed the game by being "context-aware" with its lighting. It doesn't just "paint" a face; it calculates how light bounces off the iris and diffuses through layers of skin (subsurface scattering).
I recently reviewed a piece on Portrait Mastery that highlights how to use "Studio Direction" instead of "Pixel Gambling."
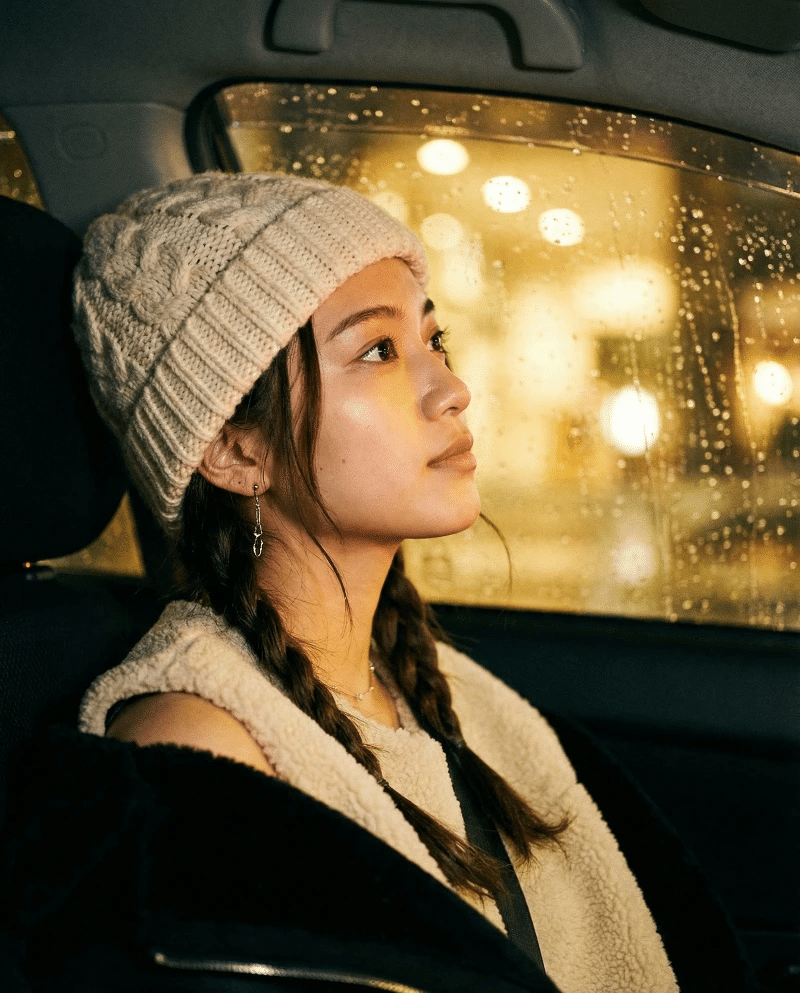 Above: Notice the natural skin texture and iris reflections achieved through material-first prompting.
The Secret of "Equipment Keywords"
One of the most powerful "hacks" I picked up from that review is the use of technical equipment names. AI models are trained on massive datasets that include photography metadata (EXIF data).
- Using "85mm f/1.8" tells the AI to create a specific type of shallow depth-of-field and facial compression that "blurry background" just can't match.
- Using "Kodak Portra 400" or "Fujifilm Superia" triggers a specific color science and grain structure.
 Studio lighting isn't a filter; it's a physical calculation. Using equipment keywords directs the model's light engine.
3. The "Tactile Magic" of Fiber art
This is where Nano Banana really flexes. Most AI models struggle with materials that aren't "shiny" or "smooth." They default to a "plastic" look because smooth surfaces are easier to calculate. But the Tactile Magic collection on Patreon shows a completely different side of the model.
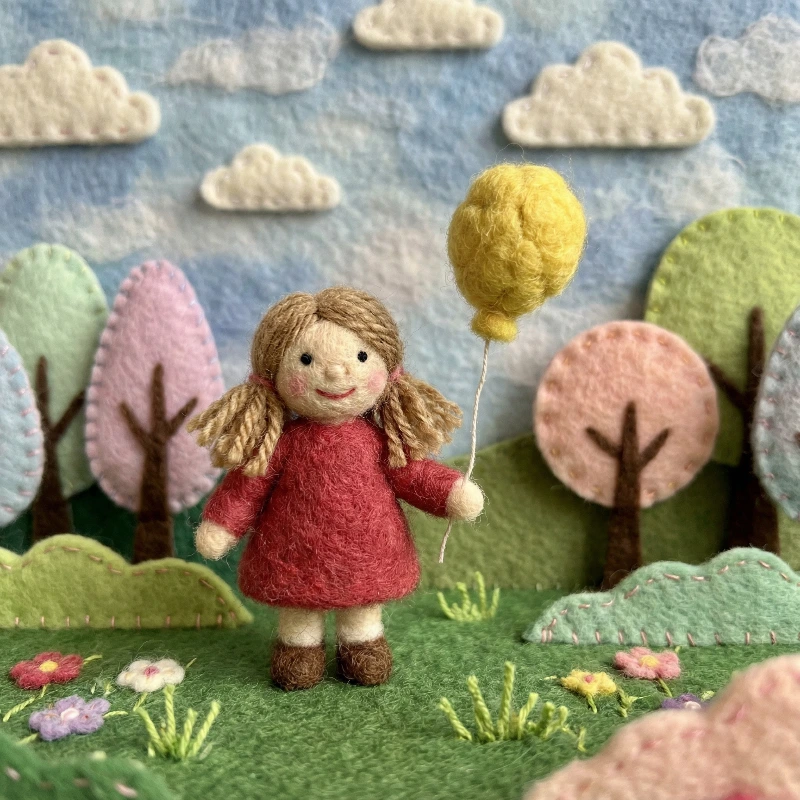 The interplay between needle-felted wool and real moss creates a sense of tactile realism.
Why "Imperfection" is the Key to Realism
The magic happens when you embrace "handcrafted" keywords. In my own testing, I've found that including specific textile techniques forces the model into a high-detail mode.
- Needle-felted wool: This keyword is like a cheat code for texture. It forces the AI to render individual, "stray" fibers that catch the light unevenly.
- Uneven stitching: This prevents that "perfectly symmetrical" AI look that feels fake. Real handmade items have flaws, and telling the AI to include them actually makes the image feel more expensive.
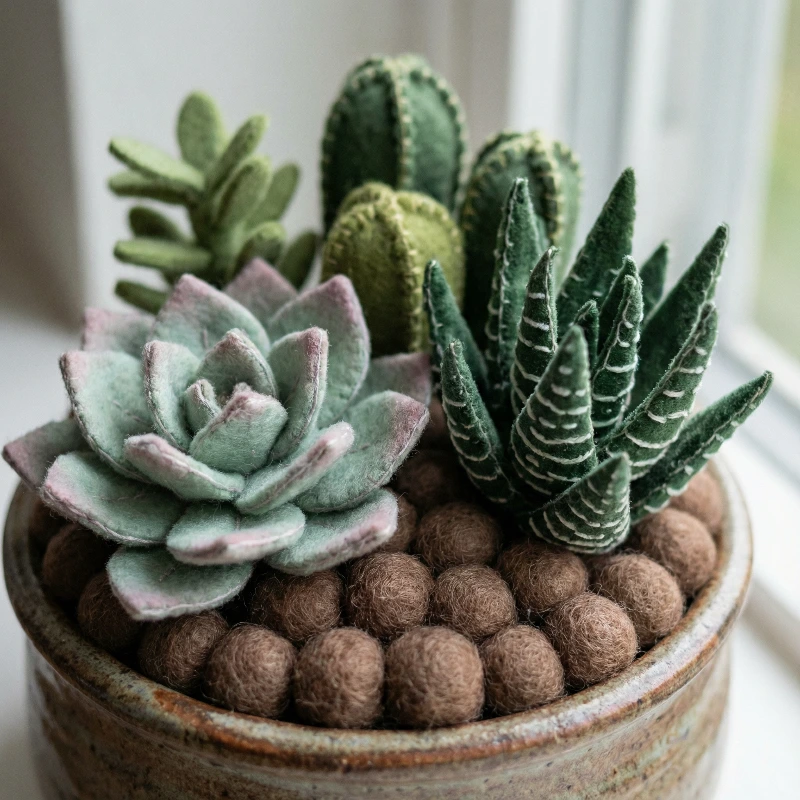 Using "Macro Photography" keywords forces the model to focus on micro-fibers and loop-back stitches.
4. Dioramas: The Power of Structural Constraints
I used to think "diorama" was just an aesthetic choice. It's actually a structural constraint. As explained in the Substack guide on 3D Dioramas, telling the AI to put something in a "box," a "glass jar," or a "cross-section" forces it to focus on scale markers.
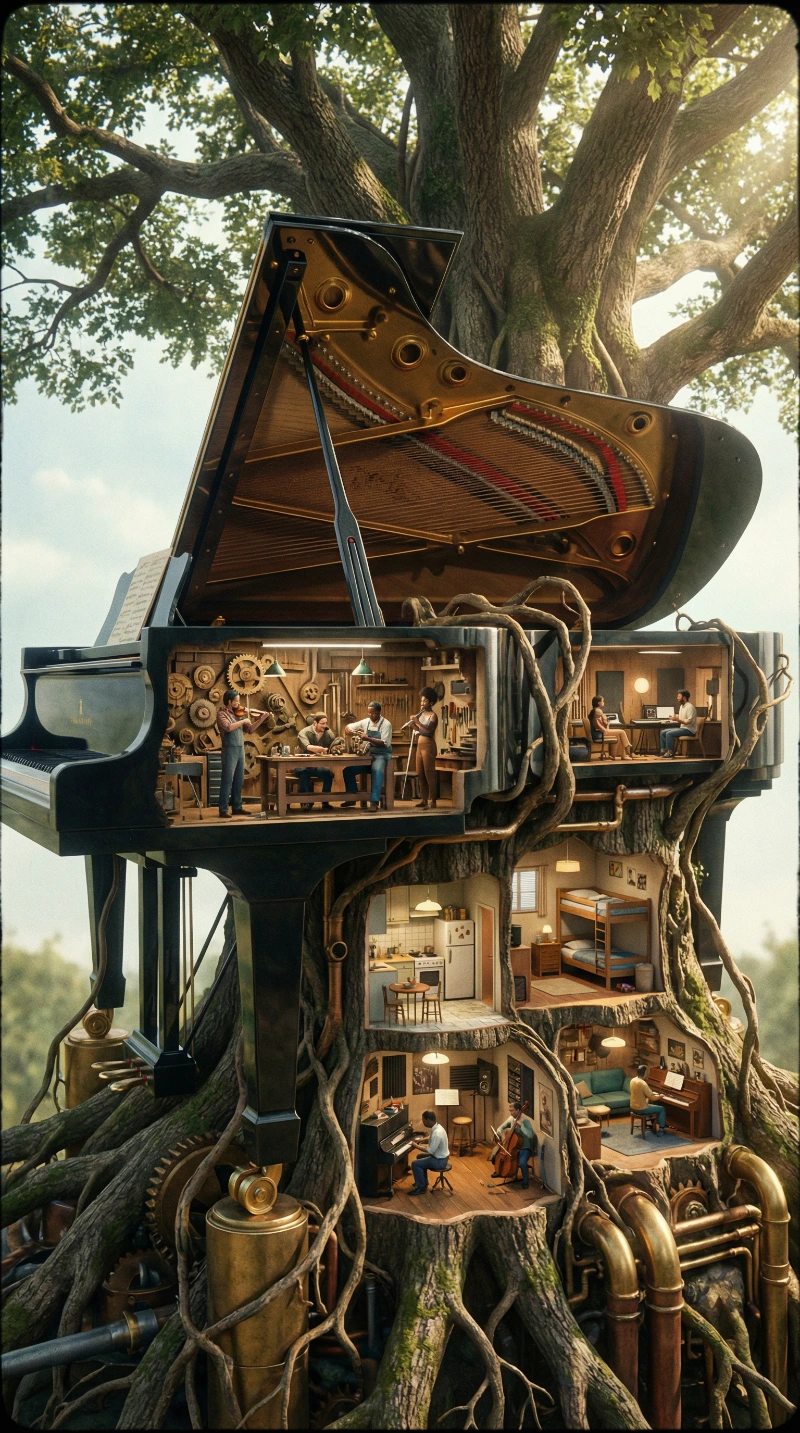 A "cross-section" prompt reveals a self-contained world with its own internal logic and lighting.
Lessons from the "Book Nook"
When you ask for a "Mechanical Tree Diorama," you aren't just getting a tree. You're getting a self-contained world. The AI understands that because the space is limited (the "box"), the level of detail inside that space needs to be higher.
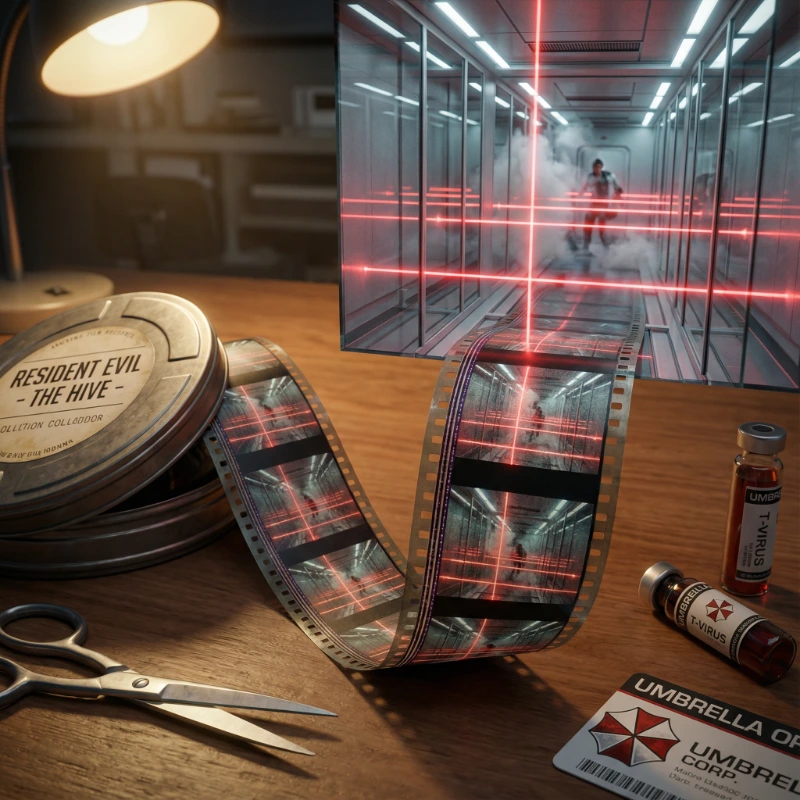 Meta-descriptions like "emerging from film grain" trigger unique rendering pathways for surreal, high-concept layouts.
5. Visual Order: The Aesthetics of Knolling
If your prompts feel cluttered or "messy," you need to learn about Knolling.
Knolling is the process of arranging related objects in 90-degree angles, usually seen from directly above. According to the aesthetic guide on Note.com, Nano Banana loves this because it removes the "fog" of complex perspective.
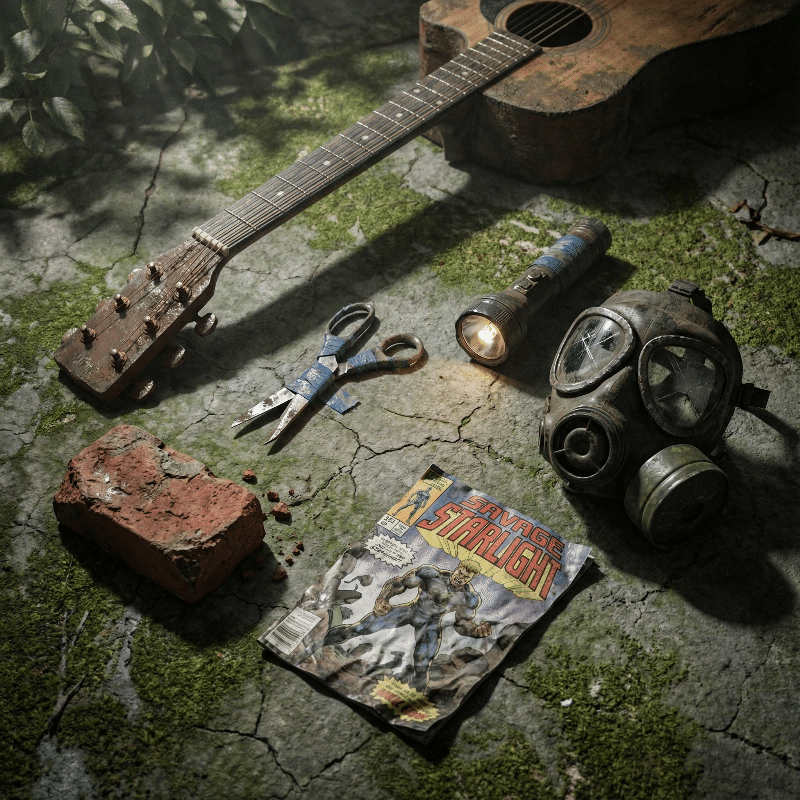 By specifying "orthographic" and "90-degree layout," you provide a grid that ensures clean, independent object rendering.
Why AI Loves the Grid
When you use keywords like "orthographic," "top-down," and "90-degree layout," you’re giving the AI a coordinate system. It stops trying to guess how objects should overlap and starts focusing on the "independence" of each item.
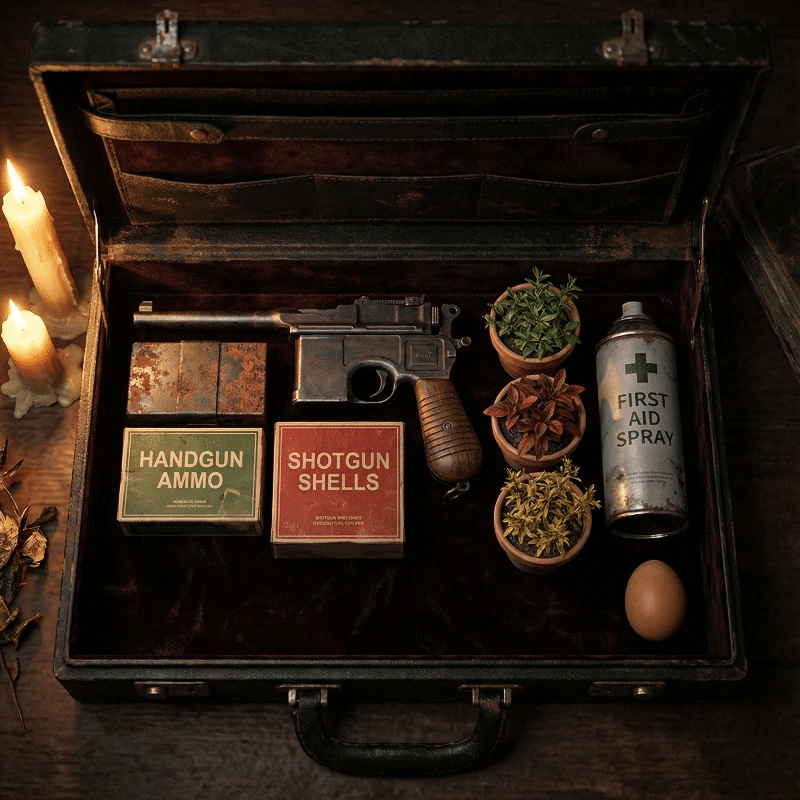 Knolling is perfect for storytelling through objects, such as a "Resident Evil" style inventory case.
6. Community Resources: Don't Prompt in a Vacuum
The best way to learn isn't through a manual; it's through observation. The Nano Banana community is one of the most active in sharing "open source" prompts.
- Awesome Nano Banana Prompts (GitHub): This is essentially a living textbook. If I’m struggling with a "liquid" texture, I search the repo for "water" or "mercury" and see what keywords people are using.
- BananaPrompts.fun Gallery: If you prefer a more visual search, this is unbeatable. You can see the exact settings—seed, guidance scale, and prompt structure—behind every image.
7. Troubleshooting: Why is my image "Mid"?
Before we wrap up, let's look at three common reasons why prompts fail:
1. The "Buzzword Soup" If your prompt contains "4k, 8k, masterpiece, highly detailed," you're wasting tokens. Nano Banana Pro is already high-resolution. Replace them with specific materials (e.g., "brushed aluminum").
2. Lighting is the "Second Subject" If you don't describe the light, the AI defaults to "flat, front-lit." Always give the light a direction and a color. "Warm light from the left" adds instant 3D volume.
3. Ignoring the "Background Logic" A subject floating in a void looks fake. Give it a context. Even "against a weathered brick wall" gives the model something to bounce the light off of.
Final Thoughts: Treat it Like a Conversation
Prompting shouldn't feel like barking orders at a robot. It’s a conversation where you provide the context and the physics, and the model provides the rendering.
Stop trying to write the "perfect" prompt on the first try. Think of your generations as "sketches." Keep what works, discard what doesn't, and build your own material library.
For more inspiration, check out our latest collections and join the community of prompt engineers pushing the boundaries of what Nano Banana can do.